Norwood CSA Food Co-op

Thursday, August 4, 2016

Cucumber Soup and Zucchini Bread on the Menu!


It's Thursday, and I always get excited to receive a new veggie delivery from our Norwich Farms CSA.  I must confess, though, that I still have cucumbers, squash and cabbage left from last week, and I suspect that others are experiencing the same thing. So, here are two recipes using cucucmbers and squash.  Both are found in my favorite classic cookbook--Jane Brody's Good Food Book, originally published in 1985.  You can still find used copies for $2-3+shipping, at Barnes & Noble's website, or at a used book sale at a local library. It's my main recipe source over the years because the ingredient lists contain less butter, sugar, and white flour than recipes in other classic cookbooks.

As an alternative, the simplest and yummiest way to prepare zucchini that I have found is to slice it thinly, and add it to a skillet with a tablespoon or two of hot olive oil (depends on the size of your skillet and the size of your squash), turning several times until it browns lightly.  Season with salt, pepper, a bit of your favorite vinegar, lemon or lime juice, or a packet of True Lemon or True Lime. You can also sprinkle on grated parmesan or romano cheese after you remove it from the heat.  I know a lot of restaurants put a coating of egg and bread crumbs on zucchini before frying it, but to me, the plainer method of cooking allows the flavor of the squash to shine through.  


Thursday, July 28, 2016

Good evening Norwood CSA members!

Found the perfect recipe for those who still have some of the bounty from last week. It's a shaved vegetable salad that includes green beans, fennel, cucumber, zucchini, and radish. Only the green beans are cooked (very briefly) and the rest of the veggies are sliced as thin as you can get them, so they absorb the marinade well. As with the recipe last week, I put this in a sealed container and let it sit in the refrigerator for at least a few hours before serving.  I used a very sharp paring knife, but you could prepare with a mandoline or food processor.   This can be a nice hot-weather side dish, or toss it with pasta, garlic and tomato sauce (see picture).  I found the recipe in the Sonoma Diet Cookbook, as the base for a slice of grilled salmon.  You could top it with chicken, as well.


Thursday, July 21, 2016


Sweet Piccalilli Relish—A Favorite of Many Cultures

This is a version of what some call “bread-and-butter” pickles. My grandmother, the daughter of Slovak immigrants, used to “put up” Mason jars of this kind of sweet relish made from garden-fresh cucumbers—for a taste of the garden all winter long!  I recently learned that immigrants from Scandinavian countries have their dill-spiced versions, and those from the Caribbean islands add many of their unique traditional spices to a similar concoction.  The British have used the term “piccalilli” for eons, but I think it’s a different type of relish derived from hot Indian peppers.


Here at the Norwood CSA, cucumbers and peppers should be plentiful through the fall.  Since you can only eat so many of them sliced up in salads, this is a way to expand your cucumber repertoire! The relish is a great topping for turkey burgers and chicken or veggie patties.  After putting it together, leave it in the refrigerator for a day so the flavors intensify.  It keeps well for at least a week in a tightly sealed jar in the refrigerator. 

Fresh Vegetable Ingredients

  • 16 oz small cucumbers, sliced thin in food processor. Don’t peel. Just trim off the ends.  It’s easiest if you use those that are small enough to fit in the feed tube of  the machine.
  • 1 large red bell pepper, shredded in food processor. 
  • 1 medium white onion, quartered and sliced thin in food processor (or use peeled tiny white onions).
  • large clove of garlic, peeled and smashed, and a handful of small cauliflower heads
  • 2 T kosher salt
Dressing Ingredients:

  • 1 c. white or cider vinegar
  • 1 c. white or brown sugar (you can substitute stevia or reduce sugar, if desired)
  • ½ T mustard seed
  • ½ t celery seed
  • ½ t turmeric
  • handful of whole cloves (remove before serving), or a pinch of ground cloves 

Preparation:

Put sliced/shredded veggies in big bowl and cover with a tray of ice cubes and a cup of water.  Sprinkle with 2T kosher salt.  Cover with lid or plastic wrap, and place in refrigerator.  After 3 hours, remove veggies, and drain out water and ice. You can rinse in cold water if you want to remove the salt, as well. 

You can make the dressing either in the microwave or on the stovetop. 

Microwave:  Put all the dressing ingredients in a large, microwave-safe dish and cook uncovered for 6 minutes.  Stir. Add veggies, cover, and cook for 12 minutes more.

Stovetop:  Put all the dressing ingredients in a medium-sized pot, bring to a boil, then boil for 5 minutes.  Add veggies, stir, and re-heat the pot to just below boiling. 

Stir the heated veggies and dressing well, then chill for several hours before serving.  
   

Sunday, June 19, 2016

Summer season has officially started. Bring your compost!

CSA member picks up her share of vegetables
Summer season has begun, and we can now look forward to fresh greens and other veggies every week! I love just grabbing a handful of them and adding them to every dish. Kale, dandelion, lettuce, garlic, bok choy, and more as the season progresses.

Jessica of the NYC Compost Project and a Master Composter student
While you're at it, bring your food scraps in to compost rather than letting them accumulate in landfills. We are a drop-off site for the NYC Compost Project in the Bronx. From 4:00pm to 7:30pm every Thursday, bring your food scraps to get composted at the community garden drop off site located at 2978 Bainbridge Ave, Bronx, NY 10458.


Remember to only bring compostable food items!

Goes in:

  • Fruit & vegetable scraps
  • Crushed egg shells
  • Tea bags
  • Coffee grounds with filters
  • Wood ashes
  • Leaves
  • Grass
  • Weeds
  • Garden plants

Stays out:

  • Meat, fish, & fats
  • Dairy products
  • Food sauces
  • Cooking oils
  • Pet waste
  • Walnuts
  • Chemically treated grass
  • Non organics such as plastics, metals, glass, etc.

Our lovely community garden drop-off/pick-up site

Wednesday, January 27, 2016

Making the Most of Winter Share


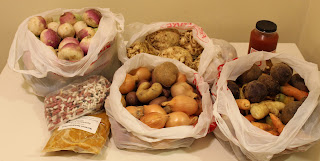
Unpacking my share at home (it's a lot!)
Winter share is different from summer share. It's less frequent, predominantly root vegetables, and generally bigger and heavier. I find that the best way to handle this is to make large batches of food at once, which I love doing since it saves time. I may be in the minority, but winter share is my favorite. It can be intimidating at first, getting all this food at once and trying to figure out what to do with it. My first year, many good vegetables sadly went to waste in the confusion, but now I have a system!

Half of the battle is knowing what to do with the vegetables. The other half is making the decision to allocate some hours out of your life to prepare the food. The rest is easy. The reward is fresh, local, organic ready-prepared meals that can last for a long while before you need to cook again.

I have 3 standard preparations, my "go to" meals that I can use with pretty much anything the farm sends us. So if I don't have the time to experiment with new dishes, I always enjoy these. My share type is vegan, so my recipes reflect that. Admittedly, I didn't have much experience with celery root, and I had some unexpectedly delightful results with it!

Hearty Stew


Because different vegetables cook at different rates, you can get started on this and continue preparing vegetables as it cooks. Another time saver! There are many opinions as to whether or not to peel the vegetables, so you'll just have to use your discretion. I peel everything except potatoes because many skins can be bitter. For large quantities, I recommend getting a large stock pot, but I didn't have one, so I split this into 2 pots. I use about a gallon of broth (as bullion). You can eye-ball vegetable quantities. It's easy to adjust by adding more water, and water is always evaporating.

Things I don't put in the stew


  • Beets - they turn everything red
  • Radishes - can have a bite, and I prefer raw

1: Beans


The first item to go in is beans. Soak overnight, as usual with beans, then drop them in the water and boil until done or nearly done. Check after 30-40 minutes. Beans are done when you can smash them to the roof of your mouth with your tongue. Don't add any salt or seasonings to the water while the beans cook (they cook much faster that way). This is a good time to wash and prepare your vegetables.

2: Seasonings


I don't put salt in the stew. I put salty things that have other taste properties. Both bullion and tamari add umami, which is necessary for well-rounded flavor. I mix different bullions, including low sodium, since we're getting other sources of salt. Frank's hot sauce is my secret ingredient in everything (ok, not so secret anymore). Add just enough to impart flavor but not to actually taste the hot sauce. Add other seasonings as you see fit. I find that cumin adds that final touch.

3: Onions


Put the onions in next. Since they cook for a long time, they'll turn to mush, adding both body and sweetness.

4: Celery Root


Celery root and turnips
My first exposure to this strange root was through this CSA, and I had unexpected but welcomed results with it. I thought since it was so hard, I should put it in early, but boy was I wrong. It completely disintegrated. In doing so, it created a thicker, heartier stew, so I was very happy with that! Just remember to stir more because the thicker it gets, the more easily the bottom of the pot can burn. Add more water as necessary.


5: Turnips & Carrots


These are very similar, so I add them at the same time. This would also be a good time to add parsnips and other related roots.


6: Potatoes


Potatoes cook rather quickly, so I add them after the carrots.

7: Mushrooms & Garlic


These didn't come from the farm, but what stew would be complete without them? Mushrooms and garlic can go in at any time, but I put them in with the potatoes. I use approximately one head of garlic.


8: Check for Doneness


Keep stirring! Scrape the bottom so it doesn't stick. Add water as necessary. Scoop some out and try it. It's done when the potatoes are soft. Season more if desired. Yum!

9: Storage


Vacuum sealing, if possible, keeps it extra fresh
The best part about this stew, after it's deliciousness, is that it freezes very well. I make this dish first and freeze the excess in quart-sized vacuum seal pouches that contain about 2 servings each. One time, our delivery was delayed because of crazy weather, so we got two deliveries very close together, and then another member gave me her share. So much food, what to do!? I made this stew, and it warmed me all winter. I always keep a bag defrosting in the fridge.

Yummy stew all season long!


Veggie Slaw


Most of these roots are also great raw. Paired with my favorite tahini-based salad dressing and placed in a leaf of romaine lettuce, these make fantastic romaine wraps. I'm happy to scoop out some of this any time. And the diversity of raw fibers will do wonders for your gut flora.

1: What to Add


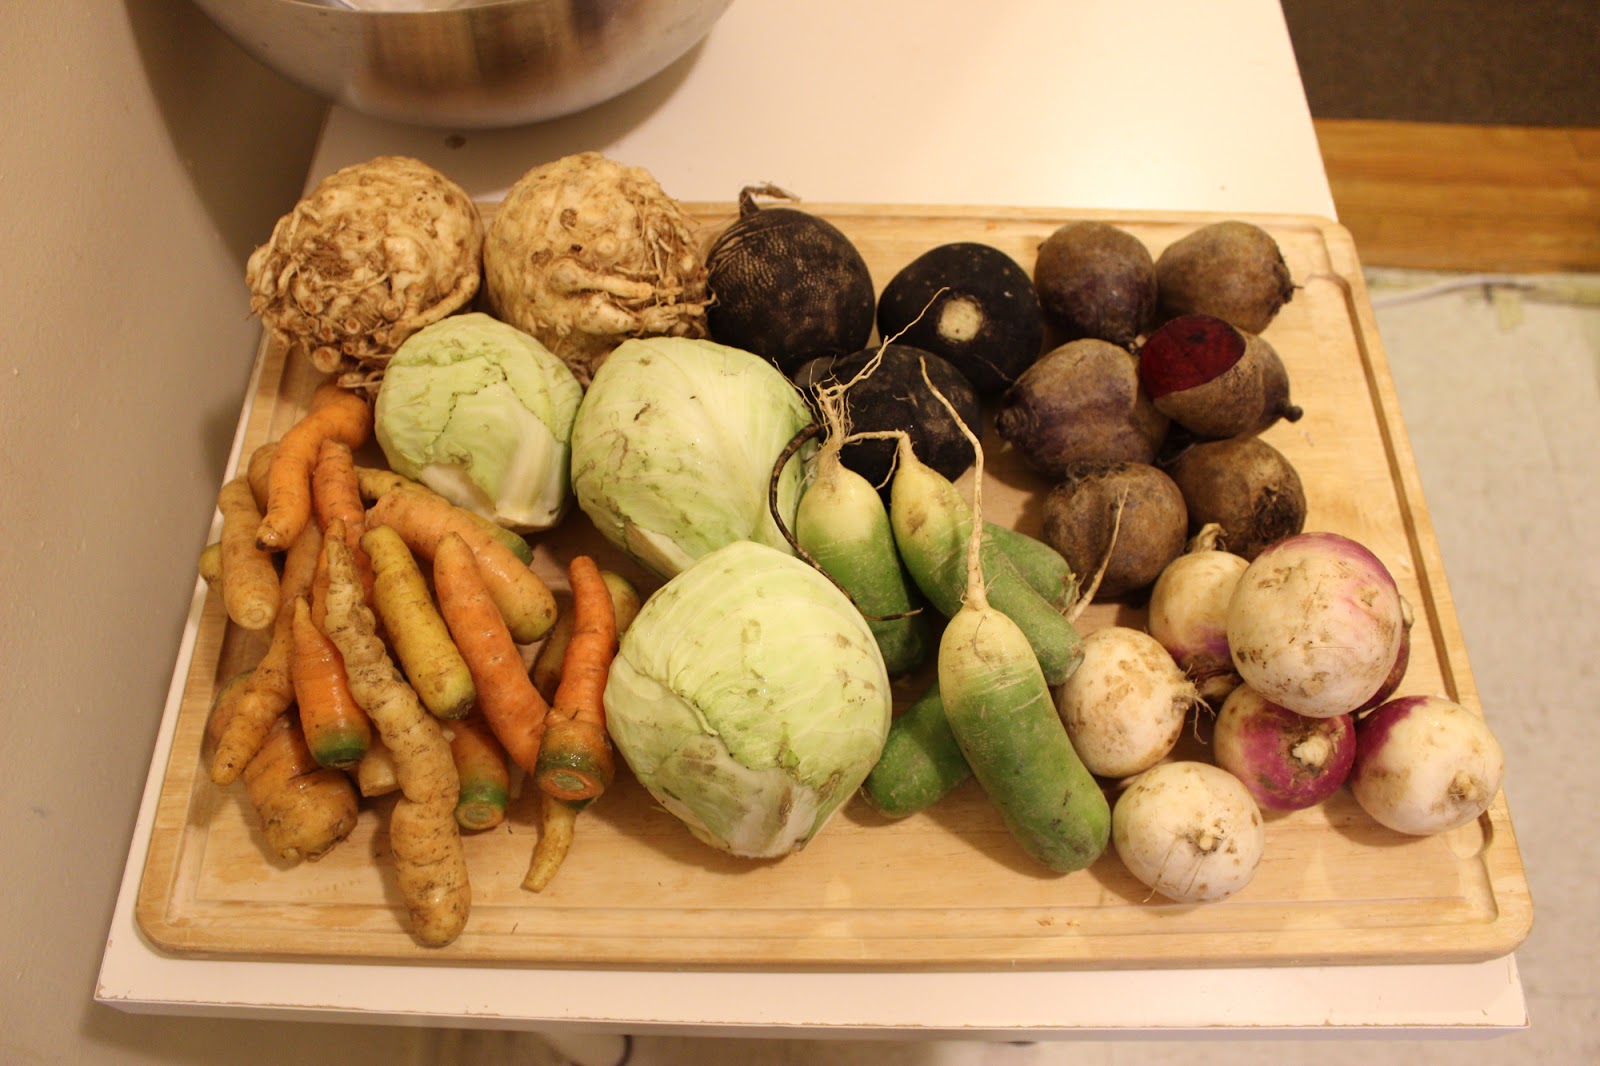
Celery root, carrots, cabbage, black radish,
watermelon radish, beets, and turnips
Just about all the roots (and the cabbage) we get can be eaten raw, except of course for potatoes.

2: Peel and Chop


I peel all the roots. You can leave the peel on the radish if you want an extra kick. Or if you're feeling really lazy, try not peeling anything. You might not mind the bitterness. Unless it's really tough skin. Always peel that. Then chop them to fit in the food processor.

3: Slice or Shred


You don't absolutely have to use a food processor to do this, but I highly recommend one. You can also slice them matchstick style or run them through a grater. Note that if you're using a food processor, you should push down hard on the plunger (the harder you push, the thicker the strips).

4: Mix


Get a big bowl or two if you're making a lot.

5: Dress


It's actually quite good all by itself, but I love Annie's Goddess salad dressing!

6: Store


As an experiment, I decided to freeze some of this to see if it's any good afterward. It's still good if you dress it, although a bit softer. But it's best if you refrigerate (not freeze) no more than a week's worth at a time. I don't store it with the dressing on, but it might be alright.

Roasted Vegetables


Everything can be roasted, and it's always good. The garlic cloves turn into pudding. So good! Though it doesn't freeze well. Just don't. They do last in the fridge a good while, but I usually finish them rather quickly.

Chop & Season


Chop the same way you would for the stew. I slice the beets slightly thinner because they seem to take longer to cook. Add onion chunks and whole cloves of garlic. Toss it with an oil of your choice and salt. That's all you really need, but you can put pepper and other seasonings too. If you leave skins on, you may have to season more to cover up the bitterness. Unrefined peanut oil has a strong flavor to compensate for that as well.

Bake at 350° & 450°


Try to lay out all the vegetables so they're not piled on top of each other if possible. Bake at 350° for 30 minutes, then stir it. If you piled it too high, and there's moisture pooling on the bottom, drain the moisture. Continue baking at 450°, and stir it every 10 or 15 minutes. It's done when browned.


Thursday, November 5, 2015

Holy Carrots!


.


We have recently had root veggies in many beautiful colors. Before we joined the CSA, I had never seen a carrot any color other than orange. Curiosity lead me to a virtual museum called World Carrot Museum which has an overwhelming amount of information.


Some highlights are:
Carrots have been cultivated for about the past millennia – starting in Afghanistan. Initially they were yellow and purple – the orange ones likely originated from the Netherlands about 600 or 700 years later. The museum refutes claims that the popularity of orange carrots has anything to do with a reaction to William of Orange – despite that Dutch leader, William of Orange, lead the multinational uprising against the invasion of the Spanish Inquisition in the late 16th century. Disproving the link between the popularity of orange carrots exploding during the same time as multinational support for the leader of Orange
is a tall order.

Different colors of carrots each have unique nutritional properties related to their pigments:
Orange, yellow and red carrots are thought to be good for vision is different ways as the chemicals they contain can be converted to different compounds that are found in the retina. White carrots are frequently used in baby foods. Purple and black carrots contain significant amounts of anti-oxidant compounds and black carrots additionally are thought to have anti-bacterial and anti-fungicidal properties.

Carrots are versatile instruments – able to take part in both the wind and percussion sections of an orchestra. They are featured as the main instruments in several veggie-themed musical groups all over the world.


During WWII carrots were featured heavily in many victory gardens and were widely used as substitutes for other ingredients that were more difficult to procure and store. The carrot was promoted as “Doctor Carrot,” not only ample and versatile but healthy. Some slogans read “Carrots keep you healthy and help you see in a black out.” Who knows? Maybe carrots had a big hand in helping win the war.

Most of the information and many of the images that I have posted here can be found at the following link:
http://www.carrotmuseum.co.uk/index.html
I highly recommend the Carrot Museum for more information than I thought possible on our pointy, colorful veggies.

Corrielle Caldwell