 |
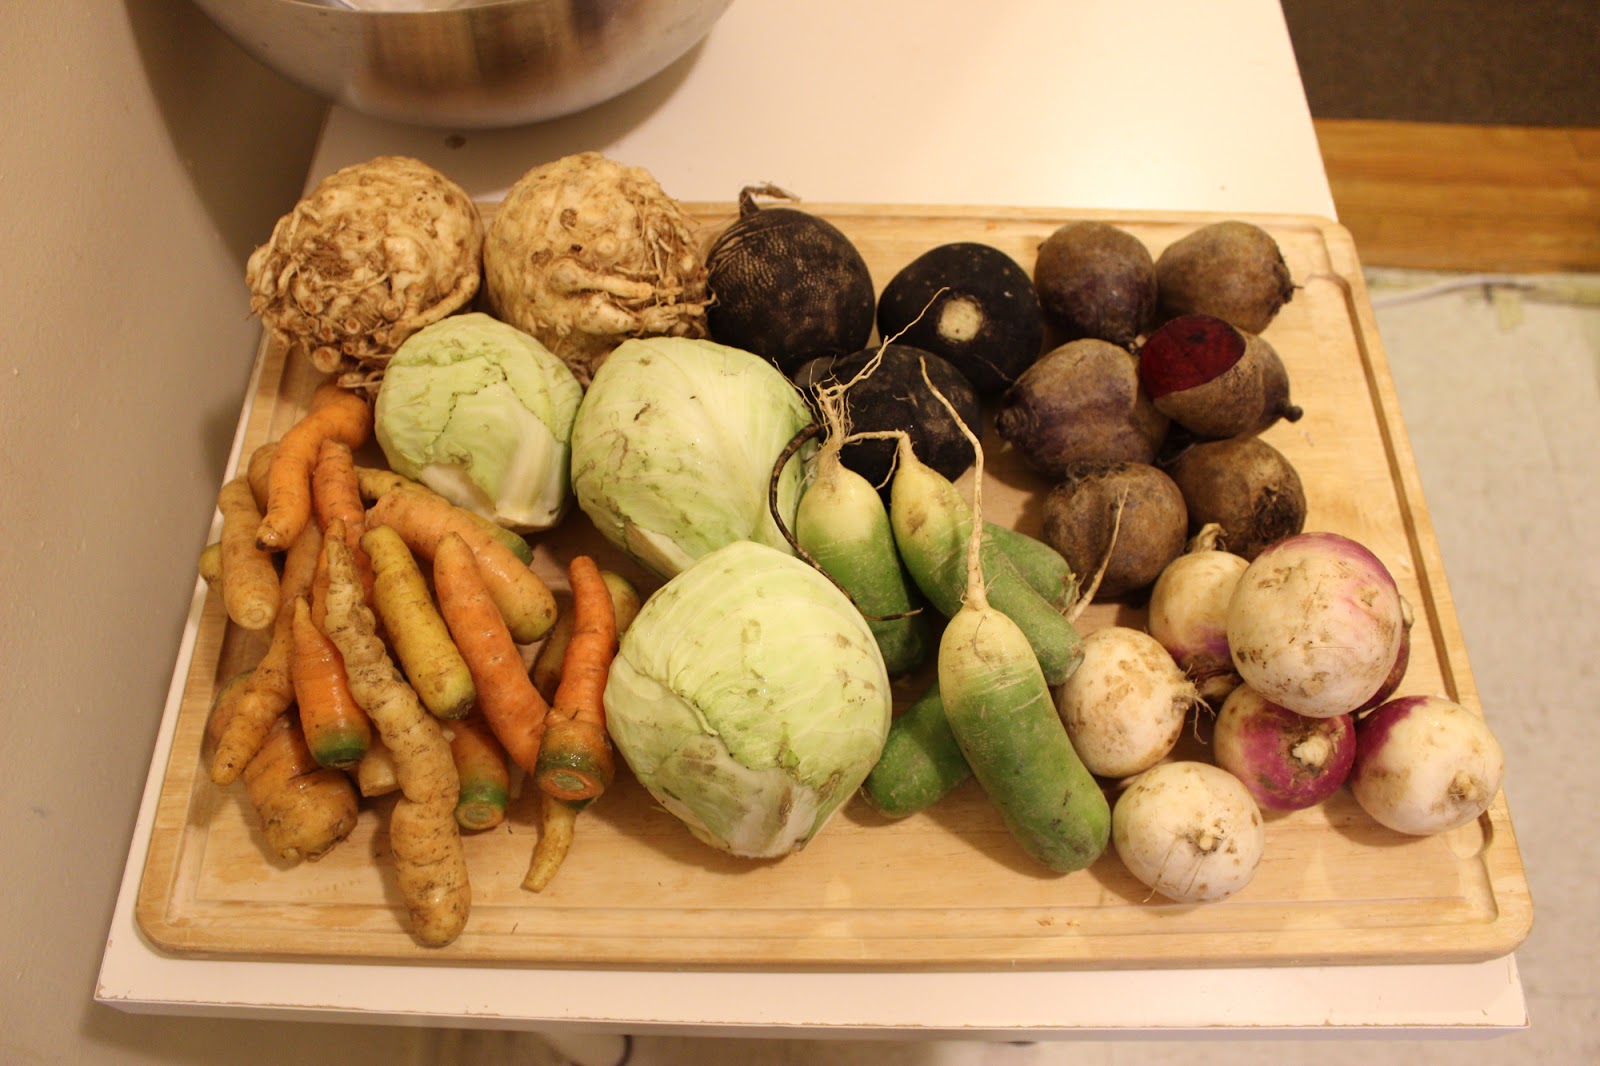
| Unpacking my share at home (it's a lot!) |
Winter share is different from summer share. It's less frequent, predominantly root vegetables, and generally bigger and heavier. I find that the best way to handle this is to make large batches of food at once, which I love doing since it saves time. I may be in the minority, but winter share is my favorite. It can be intimidating at first, getting all this food at once and trying to figure out what to do with it. My first year, many good vegetables sadly went to waste in the confusion, but now I have a system!
Half of the battle is knowing what to do with the vegetables. The other half is making the decision to allocate some hours out of your life to prepare the food. The rest is easy. The reward is fresh, local, organic ready-prepared meals that can last for a long while before you need to cook again.
I have 3 standard preparations, my "go to" meals that I can use with pretty much anything the farm sends us. So if I don't have the time to experiment with new dishes, I always enjoy these. My share type is vegan, so my recipes reflect that. Admittedly, I didn't have much experience with celery root, and I had some unexpectedly delightful results with it!
Hearty Stew
Because different vegetables cook at different rates, you can get started on this and continue preparing vegetables as it cooks. Another time saver! There are many opinions as to whether or not to peel the vegetables, so you'll just have to use your discretion. I peel everything except potatoes because many skins can be bitter. For large quantities, I recommend getting a large stock pot, but I didn't have one, so I split this into 2 pots. I use about a gallon of broth (as bullion). You can eye-ball vegetable quantities. It's easy to adjust by adding more water, and water is always evaporating.
Things I don't put in the stew
- Beets - they turn everything red
- Radishes - can have a bite, and I prefer raw
1: Beans
The first item to go in is beans. Soak overnight, as usual with beans, then drop them in the water and boil until done or nearly done. Check after 30-40 minutes. Beans are done when you can smash them to the roof of your mouth with your tongue. Don't add any salt or seasonings to the water while the beans cook (they cook much faster that way). This is a good time to wash and prepare your vegetables.
2: Seasonings
I don't put salt in the stew. I put salty things that have other taste properties. Both bullion and tamari add
umami, which is necessary for well-rounded flavor. I mix different bullions, including low sodium, since we're getting other sources of salt. Frank's hot sauce is my secret ingredient in everything (ok, not so secret anymore). Add just enough to impart flavor but not to actually taste the hot sauce. Add other seasonings as you see fit. I find that cumin adds that final touch.
3: Onions
Put the onions in next. Since they cook for a long time, they'll turn to mush, adding both body and sweetness.
4: Celery Root
 |
| Celery root and turnips |
My first exposure to this strange root was through this CSA, and I had unexpected but welcomed results with it. I thought since it was so hard, I should put it in early, but boy was I wrong. It completely disintegrated. In doing so, it created a thicker, heartier stew, so I was very happy with that! Just remember to stir more because the thicker it gets, the more easily the bottom of the pot can burn. Add more water as necessary.
5: Turnips & Carrots
These are very similar, so I add them at the same time. This would also be a good time to add parsnips and other related roots.
6: Potatoes
Potatoes cook rather quickly, so I add them after the carrots.
7: Mushrooms & Garlic
These didn't come from the farm, but what stew would be complete without them? Mushrooms and garlic can go in at any time, but I put them in with the potatoes. I use approximately one head of garlic.
8: Check for Doneness
Keep stirring! Scrape the bottom so it doesn't stick. Add water as necessary. Scoop some out and try it. It's done when the potatoes are soft. Season more if desired. Yum!
9: Storage
 |
| Vacuum sealing, if possible, keeps it extra fresh |
The best part about this stew, after it's deliciousness, is that it freezes very well. I make this dish first and freeze the excess in quart-sized vacuum seal pouches that contain about 2 servings each. One time, our delivery was delayed because of crazy weather, so we got two deliveries very close together, and then another member gave me her share. So much food, what to do!? I made this stew, and it warmed me all winter. I always keep a bag defrosting in the fridge.
 |
| Yummy stew all season long! |
Veggie Slaw
Most of these roots are also great raw. Paired with my favorite tahini-based salad dressing and placed in a leaf of romaine lettuce, these make fantastic romaine wraps. I'm happy to scoop out some of this any time. And the diversity of raw fibers will do wonders for your gut flora.
1: What to Add
 |
Celery root, carrots, cabbage, black radish,
watermelon radish, beets, and turnips |
Just about all the roots (and the cabbage) we get can be eaten raw, except of course for potatoes.
2: Peel and Chop
I peel all the roots. You can leave the peel on the radish if you want an extra kick. Or if you're feeling really lazy, try not peeling anything. You might not mind the bitterness. Unless it's really tough skin. Always peel that. Then chop them to fit in the food processor.
3: Slice or Shred
You don't absolutely
have to use a food processor to do this, but I highly recommend one. You can also slice them matchstick style or run them through a grater. Note that if you're using a food processor, you should push down hard on the plunger (the harder you push, the thicker the strips).
4: Mix
Get a big bowl or two if you're making a lot.
5: Dress
It's actually quite good all by itself, but I love Annie's Goddess salad dressing!
6: Store
As an experiment, I decided to freeze some of this to see if it's any good afterward. It's still good if you dress it, although a bit softer. But it's best if you refrigerate (not freeze) no more than a week's worth at a time. I don't store it with the dressing on, but it might be alright.
Roasted Vegetables
Everything can be roasted, and it's always good. The garlic cloves turn into pudding. So good! Though it doesn't freeze well. Just don't. They do last in the fridge a good while, but I usually finish them rather quickly.
Chop & Season
Chop the same way you would for the stew. I slice the beets slightly thinner because they seem to take longer to cook. Add onion chunks and whole cloves of garlic. Toss it with an oil of your choice and salt. That's all you really need, but you can put pepper and other seasonings too. If you leave skins on, you may have to season more to cover up the bitterness. Unrefined peanut oil has a strong flavor to compensate for that as well.
Bake at 350° & 450°
Try to lay out all the vegetables so they're not piled on top of each other if possible. Bake at 350° for 30 minutes, then stir it. If you piled it too high, and there's moisture pooling on the bottom, drain the moisture. Continue baking at 450°, and stir it every 10 or 15 minutes. It's done when browned.